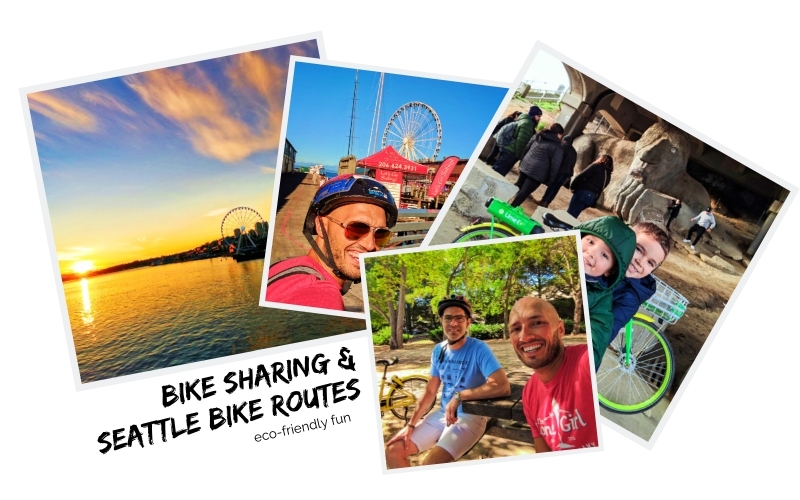
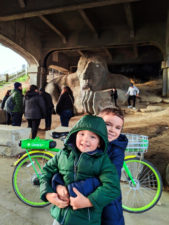
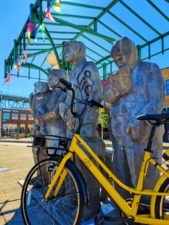
One of our favorite things to do with the kids when we’re traveling is to go biking. We try to do it anywhere possible and it turns out that it’s even fun in our hometown. The opportunity came up to have a “dads day” in the city and we got to enjoying biking in Seattle. It was kind of awesome and was the perfect Saturday Seattle activity.
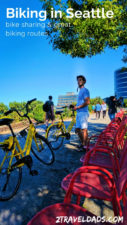
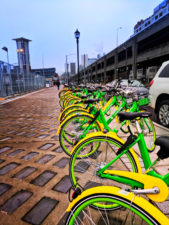
We’ve had a few bike-sharing operations pop up in Seattle, but we’ve never tried them. We’ve seen them in loads of European cities and other spots around the USA, such as San Diego and Madison, Wisconsin, but this was our first time trying out the concept of free-form bike sharing. Seattle already has an eco-friendly commuter scene and we were happy to play eco-friendly tourist. And you know, it made impromptu biking in Seattle so easy. Check it!
What is Bike Sharing
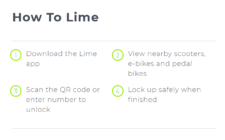
Bike sharing in Seattle runs off apps. You can download the Lime Bike app through iTunes or the Google Play store for free and then register super fast. JUMP bikes and scooters are associated with Uber, so you can use the Uber app to locate and pay for a bike rental. Bike sharing apps are location based, so once you register you’ll see a map with you (a little dot) on it… and then all of the bikes all around you. The apps have the necessary features for locating a bike, unlocking it digitally, reporting an issue with a bike, and even tracking your distance.
One of the awesome things we discovered about biking in Seattle with bike sharing was that it’s super cheap. I’m mean, you’re the one putting the energy and time into the transportation. At just $1 USD to start and then a per minute or per hour charge to ride, it’s the least expensive way to either play tourist or be an eco-friendly commuter. Considering that in Seattle a bus ride is going to run you at least $2.50 USD for a ticket, grabbing a bike sharing ride to get almost anywhere in Seattle is cheaper and more fun, for sure.
Note: depending on current promotions, new users often get to have their first bike sharing ride for free, so already it’s a win.
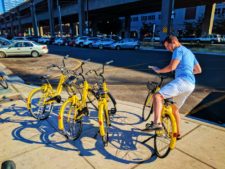

How to use bike sharing in Seattle (or anywhere)
So, you’ve downloaded the app and you’re ready to ride. Here’s how this rolls…
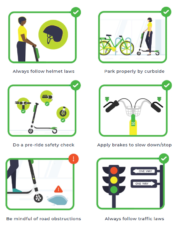
Grab your helmet (Seattle and King County have a helmet law) – other cities may not require helmets, but safety first.
Open the biking sharing app
If you don’t automatically see an available bike in plain sight, locate the nearest one on the map
Arrive at your bike
Select “Unlock” in the app
Scan the QR code OR allow the Bluetooth to communicate
The digital lock releases and you’re good to go!
Tip: before you start riding all over the place always take a moment to adjust your seat height so you’re up high enough to not have to have your quads constantly firing and wearing you out too fast.

While using a bike sharing app for biking in Seattle does give you the flexibility of riding wherever you want to and not worrying about returning your bike, you still should probably make an informal plan about where you’re riding. For being a bike-friendly city, Seattle doesn’t have a ton of clearly marked bike lanes, but there are plenty of designated bike paths. We’ve got some ideas below for easy rides within Seattle, but also know that Google Maps will help you create a smart bike route.
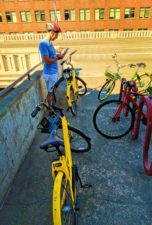
When you’re done with your day of biking in Seattle or you are just ready to drop off your bike for a while and be on foot or have a meal, you just need to lock your bike. How? Easy. You park your shared bike anywhere you might normally park a bike that’s not blocking any pedestrian or vehicle path and then move the lock dial on the back wheel or the exterior lock (depending on bike model). Done. Easy.
Once your bike is locked you’ll get a message on your phone telling you and it’ll give you a summary of distance, time and cost.
Note: if you ride to some place without a lot of publicly shared bikes but WITH a lot of potential riders, know that another rider can grab your bike if you’ve ended your session. Once you lock it the bike is up for grabs. Don’t worry though, we see bike sharing app bikes everywhere in Seattle and could’ve easily locked up and gotten new bikes.
Ideas for biking in Seattle
One of the things we loved about biking on Jekyll and St Simons Islands in Georgia was how mellow and level the bike routes were. And biking on the beach in Daytona was smooth sailing too… But we’re talking about biking in Seattle and it’s the city of seven hills (like Rome or Cininnatti) and anywhere you go you’re going to have a tiny climb at least. The following bike routes should provide some great sights to see while keeping the ride chill.
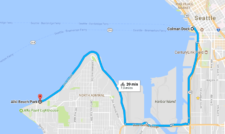
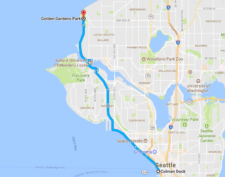
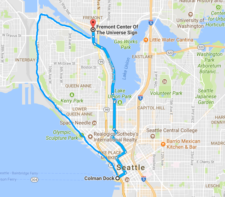
Biking to West Seattle
Quick disclaimer: we didn’t use Seattle bike sharing bikes to ride to West Seattle and Alki Beach, but we’ve done it plenty of times. Starting from downtown Seattle by the ferry terminal, you can follow Alaskan Way until you join the Elliott Bay Trail and Marginal Way. This gets you through the industrial side of downtown and keeps you right around sea level. You’ll then continue to the West Seattle Bridge Trail (don’t worry, you’re not going on the high bridge) until you get to the Alki Trail.
The Alki Trail will guide you along the rocks and boulevard, going past condos and coffee shops and giving a beautiful view of Seattle across the bay. It’s very popular for biking in Seattle as well as running, walking and rollerblading/skating. Be sure you’re using the correct lane while you’re on bike. At the end of the trail is Alki Beach Park, with picnic spots, sandy beach, Duke’s Chowder House and more. Alki is the Seattle version of a beach neighborhood and it’s perfect for sunny summer days.
Tip: if you love lighthouses like we do, continue pack the Alki Beach Park to the Alki Point Lighthouse. It’s one of two lighthouses within Seattle city limits and is pretty adorable.
Bike route link: click here to view bike route details or load on Google Maps on your phone

Biking to Ballard
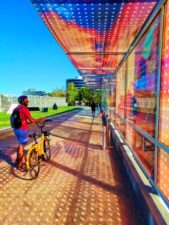
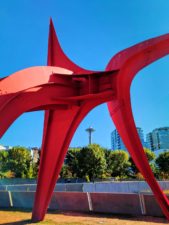
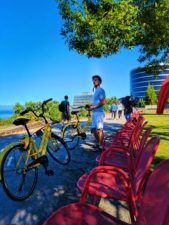
Two of the most well known neighborhoods of Seattle are Ballard and Fremont. They are right next to each other, north of Downtown Seattle. Biking to either of them from the Seattle waterfront is pretty simple. Starting along the waterfront and seeing iconic sights like the piers and the Great Wheel, you’ll quickly move into the Olympic Sculpture Park (OSP). You can either continue through it (walking your Ofo bike) or take the low road along the water through Myrtle Edwards Park. On our most recent day biking in Seattle we went through the OSP.
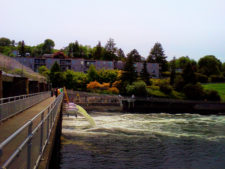
If you chose to stay by the water, riding through Myrtle Edwards Park will keep you on a simple, nearly continuous bike path via the Elliott Bay Trail. This will actually give you the opportunity to cross the Ballard Locks and check out the Shilshole area before reaching Golden Gardens Park where you’ll find a beach and small estuary.
Bike route link: this route crosses the Ballard Locks. Open in Google Maps for details.

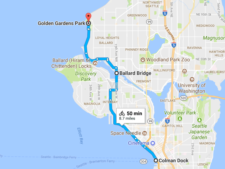
The other path you may choose goes through the OSP and then along Elliott Avenue to the Ballard Bridge. Riding over Seattle’s Fisherman’s Wharf and through the old town of Ballard Avenue you get to see where Seattle keeps its hipsters. Keep on going and you’ll make it to Golden Gardens.
Tip: you can still make a stop off at the Ballard Locks if you would like to. Remember, if you park and lock your Ofo bike, another rider and unlock it, so it’s best to keep it with you in this area.
Bike route link: the way crosses the Ballard Bridge and takes you through the trendy spots. Open in Google Maps for details.

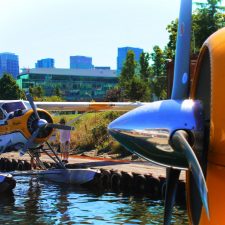
Biking to Fremont
Fremont is one of Google campuses, but it’s also home to loads of good restaurants, quirky shops and lots of cool public art. Riding to Fremont from downtown Seattle is just as easy as biking to Ballard. You can either take the short way with a hardcore elevation gain and ride along Lake Union (pretty!) or you can keep it chill and follow the Elliott Bay Trail and then the Ship Canal Trail and just breeze along. You can’t go wrong either way, but the Ship Canal Trail is about fifteen minutes longer.
Bike route link: Fremont via Lake Union in Google Maps; Fremont via Ship Canal Trail in Google Maps

We could go on and on making fun routes for all kinds of different experiences biking in Seattle, but these options are going to be the easiest with some of the best sights. We loved using Ofo to have a new biking adventure and really appreciated the flexibility of the app/platform. While bike sharing is probably going to be used more by locals getting from point A to point B, it’s actually perfect for tourists looking to get some exercise and blend into Seattle’s awesome outdoor, eco-friendly culture.
Have you used Ofo in another city? Do you have a suggestion for our next adventure of biking in Seattle? Leave a comment below so we can plan our next “dads day” in the city and get Ofo bikes again!
Want to pin this for later when you’re planning your outdoors adventures in the Pacific Northwest? Go for it!